| Author | Message |
|---|
murff
Joined: 27 Oct 2009
Posts: 620 |  Posted: Sun Jul 12, 2015 7:57 am
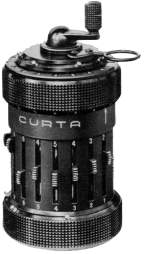
looks cool your blue Curta parts! And it seems that also the force is 3:1 for moving the setting knob 
and... good things take time  |
|
mwu
Joined: 05 May 2015
Posts: 39 | Posted: Sun Jul 12, 2015 11:38 am
I have not decided whether I will use the plastic colors or attempt to paint the external facing parts to have a similar appearance to the real thing.
I do want to alternate the color of the selector knobs the way some of the Curta Type IIs do even though it's not really accurate for a type I.
Also, I have not decided whether I would print a Type II, but I have begun modeling the parts. |
|
mwu
Joined: 05 May 2015
Posts: 39 | Posted: Tue Feb 02, 2016 10:30 pm
Well after changing jobs and a family emergency, I am finally back to printing. I printed out the main body and the tens bell this time around: http://wudev.digitaltorque.com/2016/02/3d-printed-curta-part-vi.html
I plan on printing the step drum, main axle, and the bottom parts next. I should be able to begin some real assembly once I have some of those out of the way. |
|
aterren
Joined: 08 May 2015
Posts: 26 | Posted: Wed Feb 03, 2016 12:33 am
Great! We look forward to your progress. |
|
mwu
Joined: 05 May 2015
Posts: 39 | Posted: Thu Apr 28, 2016 3:48 pm
I forgot to post here for my last update --
Part VII
And I just completed an eighth post --
Part VIII
The Curta is nearly done on the bottom portion. I need to disassemble it and clean up some parts to eliminate some catching problems and then reassemble it with a new main axle and step drum. After that I begin printing and assembling the top results section of the Curta. Most of the difficult problems have been taken care of. |
|
murff
Joined: 27 Oct 2009
Posts: 620 | Posted: Thu Apr 28, 2016 4:49 pm
congratulation for this exciting intermediate result! |
|
mwu
Joined: 05 May 2015
Posts: 39 | Posted: Mon Aug 29, 2016 8:01 pm
I posted Part IX today after a lot of issues getting the carriage casting printed correctly (strange issues with the alignment of its features printing incorrectly).
The Curta is now mechanically complete (it'll do the math, but you can't read it since their are no numbers yet). I do need to finish a few details like the digit markers before moving on to painting it.
In the meantime I plan on (2D) printing out some numbers that I can wrap around the dials so I can make a meaningful video of its functionality. |
|
murff
Joined: 27 Oct 2009
Posts: 620 | Posted: Mon Aug 29, 2016 8:14 pm
I can't believe it - what an extraordinary work!
When mass production begins?
|
|
stenella
Joined: 03 Jun 2008
Posts: 48 | Posted: Mon Aug 29, 2016 9:18 pm
My hat is off to you sir ... incredible!  |
|
Pete
Joined: 04 Mar 2010
Posts: 203 | Posted: Thu Sep 01, 2016 1:11 pm
That is excellent work, friend. Very impressive. When you start selling kits you will see interest from many corners, I think |
|
mwu
Joined: 05 May 2015
Posts: 39 | Posted: Mon Jul 10, 2017 10:03 pm
Ok, so I ran into loads of problems painting it. I thought it was my inexperience painting, but it turns out I had multiple bottles of bad paint. Switched brands and it was fine.
Anyway, pictures! https://www.reddit.com/r/3Dprinting/comments/6mfcyx/completed_paint_on_3d_printed_curta_calculator/ |
|