| View previous topic :: View next topic |
| Author |
Message |
kagamma
Joined: 15 Oct 2024
Posts: 3
|
 Posted: Wed Oct 16, 2024 7:19 am Post subject: Attempt to disassemble a curta type II Posted: Wed Oct 16, 2024 7:19 am Post subject: Attempt to disassemble a curta type II |
 |
|
Hi! I've owned a curta type II for quite a while, but only recently after printing and assembling Wu's 3D-printed version of the curta, did I have enough courage to disassemble mine for some cleaning and lubrication.
Disassembling the main body went quite smoothly; I managed to take everything out for ultrasonic cleaning and lubrication, and reassembling them back, following the service manual: https://www.vcalc.net/cu-lube.htm . However, when it came to the carriage, everything went well until I needed to remove the two carriage pins: https://imgur.com/a/4LiBK3s
Unlike the type I/3D printed version, these 2 are horizontal. The one in the picture is very tight, and any attempts to push it out have failed so far. I could try to brute-force it, but I am afraid I might end up damaging the surrounding area. My punch tools are also quite long, which makes it hard to hammer it out. I wonder how everyone else manages to remove them and which tools I should use in this case. I am quite new to this so any advice would be appreciated.
Also according to https://curta.li/05_anleitungen/200_service_handbuch/221_demontage_q0.html (I can't read German, so I am only looking at the pictures for reference), I am supposed to remove the two pins at once (step 11), but I can't locate the second one anywhere inside the housing. |
|
| Back to top |
|
 |
murff
Joined: 27 Oct 2009
Posts: 595
Location: Switzerland
|
 Posted: Wed Oct 16, 2024 8:02 am Post subject: Posted: Wed Oct 16, 2024 8:02 am Post subject: |
 |
|
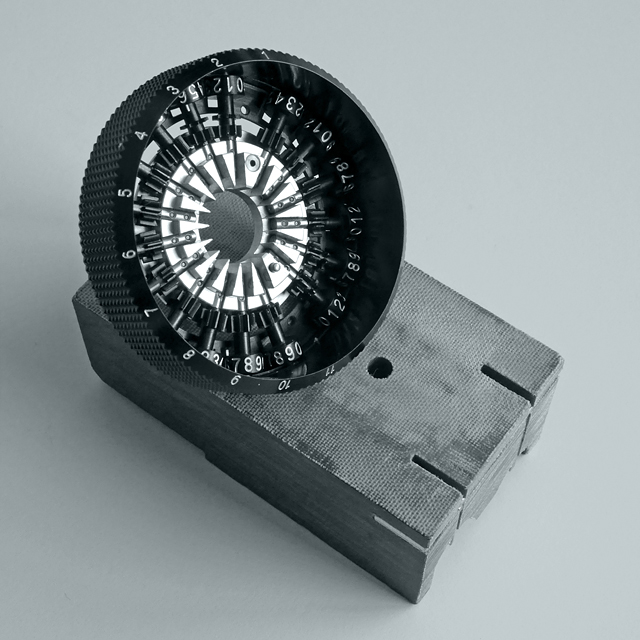
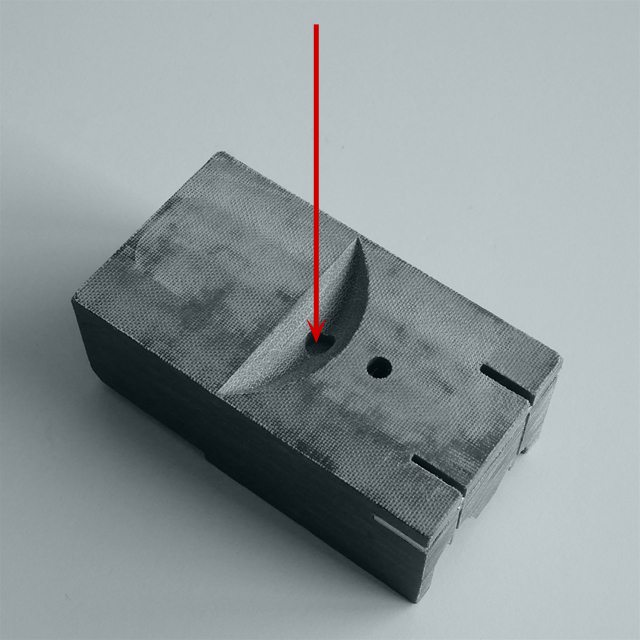
You need something like this - a base that keeps the carriage stable when releasing the pins:
 
Assembly aid for carriage ring (conical pin)
https://curta.li/05_anleitungen/500_tools/59_109109_03.html
On the other hand, the carriage can also be easily cleaned as a whole unit (without the balls and the star - as in the picture).
_________________
:: m u r f f
:: curta.li |
|
| Back to top |
|
 |
kagamma
Joined: 15 Oct 2024
Posts: 3
|
 Posted: Wed Oct 16, 2024 8:55 am Post subject: Posted: Wed Oct 16, 2024 8:55 am Post subject: |
 |
|
| murff wrote: | | You need something like this - a base that keeps the carriage stable when releasing the pins |
Thank you. I am interested in the "Punch 0,9" mentioned in https://curta.li/05_anleitungen/200_service_handbuch/221_demontage_q1.html . Do we have a picture of it?
| murff wrote: | | On the other hand, the carriage can also be easily cleaned as a whole unit (without the balls and the star - as in the picture). |
I am planning to lubricate the shafts, which I believe cannot do it without taking the whole thing out, am I right? |
|
| Back to top |
|
 |
murff
Joined: 27 Oct 2009
Posts: 595
Location: Switzerland
|
 Posted: Wed Oct 16, 2024 9:29 am Post subject: Posted: Wed Oct 16, 2024 9:29 am Post subject: |
 |
|
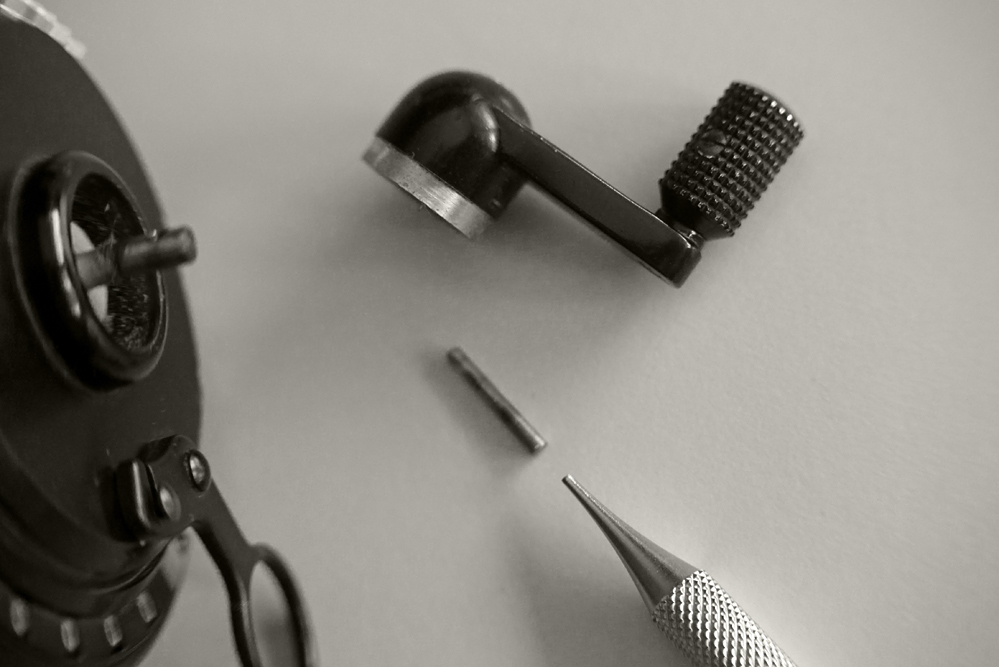
something like that:

I don't have a 0.9 mm punch.
And it works really well - first clean the carriage with thinner and then oil the shafts close to the number wheels (not too much).
_________________
:: m u r f f
:: curta.li |
|
| Back to top |
|
 |
kagamma
Joined: 15 Oct 2024
Posts: 3
|
 Posted: Thu Oct 17, 2024 4:22 am Post subject: Posted: Thu Oct 17, 2024 4:22 am Post subject: |
 |
|
| Thanks. I will go with cleaning the whole unit for now because all my punch tools are long slender type for watches and do not have enough tolerance for the push. |
|
| Back to top |
|
 |
|


